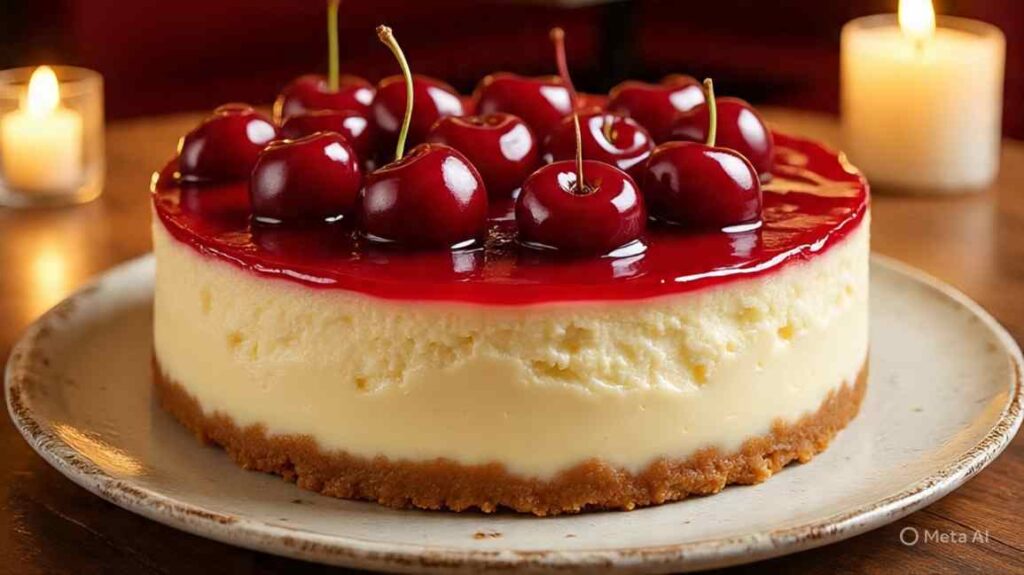
Philly cream cheese cherry cheesecake is a classic dessert with a rich, creamy texture and vibrant cherry topping. This Philly cream cheese cherry cheesecake recipe combines the tangy smoothness of Philadelphia cream cheese with sweet cherries. It’s perfect for holidays, parties, or a special treat at home.
This no-bake recipe is simple and requires minimal effort, making it ideal for beginners. The cherry topping adds a burst of flavor that complements the velvety base. You’ll need just a few ingredients and some chilling time to create this crowd-pleaser.
From crust to topping, we’ll guide you through every step clearly. You’ll learn how to make a Philly cream cheese cherry cheesecake recipe that’s sure to impress. Let’s get started with this delicious dessert.
Why Choose a No-Bake Philly Cheesecake?
No-bake cheesecakes are quick to prepare, requiring no oven time. This makes them perfect for warm days or small kitchens. The Philly cream cheese cherry cheesecake recipe delivers a creamy texture without baking.
Philadelphia cream cheese ensures a smooth, rich filling every time. The cherry topping adds a sweet-tart balance that’s universally loved. It’s a versatile dessert for any occasion.
You can make it ahead and chill it overnight. This saves time for busy schedules or entertaining. Cleanup is minimal, with just a few dishes to wash.
What You Need for Philly Cream Cheese Cherry Cheesecake
For the crust, gather 1.5 cups graham cracker crumbs, ⅓ cup melted butter, and ¼ cup sugar. The filling requires 16 oz Philadelphia cream cheese, ¾ cup powdered sugar, 1 cup heavy cream, and 1 teaspoon vanilla extract. A 21 oz can of cherry pie filling is needed for the topping.
A 9-inch springform pan is ideal for shaping the cheesecake. You’ll need a mixing bowl, electric mixer, and spatula for preparation. Parchment paper helps with easy removal.
Optional garnishes include whipped cream or fresh cherries. A measuring cup and spoons ensure accuracy. Gather all items before starting for a smooth process.
Also Check Recipe: Baileys Irish Cream Cheesecake Recipe: Creamy, Boozy Dessert
Factors Affecting Preparation and Chilling
The cream cheese’s temperature impacts the filling’s smoothness. Softened cream cheese blends easily, avoiding lumps. Let it sit at room temperature for 30 minutes before mixing.
The fridge’s temperature affects chilling time. A colder fridge (around 35°F or 2°C) sets the cheesecake faster. Ensure good air circulation for even chilling.
The cherry topping’s thickness can influence presentation. Use a quality pie filling for a glossy finish. Follow the Philly cream cheese cherry cheesecake recipe for perfect results.
Philly Cream Cheese Cherry Cheesecake Recipe
To make this Philly cream cheese cherry cheesecake recipe, prepare a graham cracker crust, mix a creamy filling, and chill for 4-6 hours. The crust takes 10 minutes, the filling 15 minutes, and chilling ensures a firm, sliceable dessert. Follow these steps for a perfect cheesecake.
Preparing the Crust
Combine 1.5 cups graham cracker crumbs, ¼ cup sugar, and ⅓ cup melted butter in a bowl. Mix until the crumbs resemble wet sand. Press evenly into the bottom of a 9-inch springform pan.
Use a flat-bottomed glass to create a firm, even crust layer. Chill the crust in the fridge for 15 minutes to set. This prevents crumbling when sliced.
If the mixture feels too dry, add an extra tablespoon of melted butter. A compact crust holds the filling well. Ensure an even thickness for a polished look.
Mixing the Filling
In a large bowl, beat 16 oz softened Philadelphia cream cheese with ¾ cup powdered sugar until smooth. Add 1 teaspoon vanilla extract and mix well. Scrape the bowl’s sides to ensure even blending.
Whip 1 cup heavy cream to soft peaks in a separate bowl. Gently fold the whipped cream into the cream cheese mixture. This creates a light, creamy filling.
Spread the filling evenly over the chilled crust. Smooth the top with a spatula for a clean finish. Tap the pan gently to remove air bubbles.
Adding the Cherry Topping
Spoon 21 oz of cherry pie filling evenly over the chilled filling. Spread gently to cover the entire surface. Use a high-quality pie filling for a glossy, vibrant topping.
For a decorative touch, swirl the cherry topping slightly with a spoon. Avoid overmixing to keep the layers distinct. Refrigerate immediately after adding the topping.
If fresh cherries are available, add a few as garnish after chilling. This enhances the presentation. Ensure the topping is spread evenly for consistent flavor.
Chilling the Cheesecake
Place the cheesecake in the refrigerator for 4-6 hours, preferably overnight. Cover with plastic wrap to prevent fridge odors from absorbing. Keep the pan level for even setting.
Check after 4 hours; the center should feel firm to the touch. If still soft, chill for an extra hour. A cold fridge speeds up the setting process.
Remove the cheesecake from the springform pan before serving. Run a knife around the edges for easy release. Slice with a warm, sharp knife for clean cuts.
Tips for Perfect Cheesecake
Use room-temperature cream cheese for a lump-free filling. Whip the heavy cream just to soft peaks to avoid overmixing. Chill the crust before adding the filling for better structure.
Line the pan with parchment for easy removal. Add the cherry topping just before chilling to keep it fresh. Follow this Philly cream cheese cherry cheesecake recipe for consistent results.
Topping Variations and Prep Times
Customize your cheesecake with different toppings. Below is a table with options to enhance this Philly cream cheese cherry cheesecake recipe.
| Topping Type | Preparation | Prep Time |
|---|---|---|
| Cherry Pie Filling | Spoon from can | 2 minutes |
| Whipped Cream | Whip with sugar | 5 minutes |
| Chocolate Shavings | Grate or curl | 3 minutes |
Add toppings after chilling for the best presentation. Prep times are quick, keeping the recipe simple. Choose toppings that complement the cherry flavor.
Common Mistakes to Avoid
Using cold cream cheese can result in a lumpy filling. Let it soften at room temperature for 30 minutes. This ensures a smooth, creamy texture.
Overmixing the whipped cream can make it grainy. Stop at soft peaks for a light filling. Fold gently to maintain the airy texture.
Not chilling long enough leads to a soft cheesecake. Allow at least 4 hours, ideally overnight. This ensures clean slices and a firm texture.
Adjusting for Different Pan Sizes
A 9-inch springform pan is standard for this recipe. An 8-inch pan creates a thicker cheesecake, needing 5-6 hours to set. A 10-inch pan makes a thinner dessert.
For an 8-inch pan, reduce the filling slightly (use 12 oz cream cheese). For a 10-inch pan, the standard recipe works but expect a thinner layer. Adjust chilling time as needed.
Springform pans are best for easy removal. Line with parchment for clean slices. Always follow the Philly cream cheese cherry cheesecake recipe for best results.
Benefits of No-Bake Philly Cheesecake
This recipe takes under 30 minutes of active prep time. No baking makes it ideal for warm weather or small kitchens. The result is a professional-quality dessert.
Philadelphia cream cheese guarantees a rich, creamy filling. The cherry topping adds a vibrant, sweet-tart flavor. It’s a versatile dessert for any occasion.
You can prepare it ahead and chill overnight. This saves time for entertaining or busy days. The recipe is forgiving and perfect for beginners.
Creative Variations and Serving Ideas
Try a chocolate graham cracker crust for a richer flavor. Swirl in some chocolate syrup before chilling for a marbled effect. These enhance the cheesecake’s decadence.
Top with fresh cherries or mixed berries for a fresh twist. A drizzle of caramel adds extra sweetness. Keep toppings light to maintain the creamy texture.
Serve in small slices, as it’s rich and satisfying. Pair with coffee or tea for a complete dessert experience. These ideas make your cheesecake stand out.
- Chocolate Crust: Use chocolate graham crackers for the base.
- Mixed Berries: Top with strawberries and blueberries for variety.
- Caramel Drizzle: Add a touch of caramel for sweetness.
Storing and Serving Your Cheesecake
Store the cheesecake in the fridge, covered, for up to 5 days. Use an airtight container or plastic wrap to keep it fresh. Add toppings just before serving.
For freezing, wrap tightly without toppings and store for up to 1 month. Thaw in the fridge overnight before serving. Add fresh toppings after thawing.
Serve chilled for the best texture. Use a warm knife for clean slices, wiping between cuts. This ensures a polished presentation for guests.
Summary
This Philly cream cheese cherry cheesecake recipe requires 30 minutes of prep and 4-6 hours of chilling for a creamy, fruity dessert. Make a graham cracker crust, whip a smooth filling, and top with cherry pie filling. Chill thoroughly and serve with optional garnishes like whipped cream. With these steps, you’ll create a delicious, crowd-pleasing cheesecake at home.
FAQ
Can I use low-fat cream cheese for this recipe?
Yes, but full-fat Philadelphia cream cheese gives a richer texture. Low-fat may result in a softer filling. Stick to the Philly cream cheese cherry cheesecake recipe for best results.
How long does the cheesecake need to chill?
Chill for at least 4 hours, preferably overnight, for a firm texture. Ensure the fridge is set to 35°F or below. Cover to prevent absorbing fridge odors.
Can I use fresh cherries instead of pie filling?
Yes, cook fresh cherries with sugar and cornstarch to make a topping. Cool before adding to the cheesecake. Pie filling is quicker and provides a glossy finish.
How do I prevent a lumpy filling?
Use softened cream cheese at room temperature. Beat until smooth before adding other ingredients. Scrape the bowl to ensure even mixing.
Can I freeze this cheesecake?
Yes, freeze without toppings for up to 1 month, wrapped tightly. Thaw in the fridge overnight before serving. Add toppings after thawing for freshness.

Philly Cream Cheese Cherry Cheesecake Recipe
Equipment
- 9-inch springform pan
- Mixing bowls
- Electric mixer or stand mixer
- Spatula
- Measuring cups and spoons
- Small saucepan (for topping)
Ingredients
For the Crust:
- 1 ½ cups graham cracker crumbs
- ⅓ cup unsalted butter melted
- ¼ cup granulated sugar
For the Filling:
- 24 oz 3 packages Philadelphia cream cheese, softened
- 1 cup granulated sugar
- 3 large eggs
- 1 tsp vanilla extract
- ½ cup sour cream
For the Cherry Topping:
- 1 can 21 oz cherry pie filling
- 1 tbsp lemon juice
- 1 tsp cornstarch optional, for thicker topping
- Optional: fresh cherries for garnish
Instructions
Step 1: Preheat the Oven
- Preheat your oven to 325°F (160°C). Grease a 9-inch springform pan lightly. This ensures the cheesecake releases easily.
Step 2: Make the Crust
- Mix graham cracker crumbs, melted butter, and sugar in a bowl. Press the mixture evenly into the bottom of the springform pan. Bake for 8-10 minutes, then let it cool.
Step 3: Prepare the Filling
- Beat softened cream cheese and sugar until smooth and creamy. Add eggs one at a time, mixing well after each. Stir in vanilla and sour cream until fully combined.
Step 4: Pour the Filling
- Pour the filling over the cooled crust. Smooth the top with a spatula. Tap the pan gently to remove air bubbles.
Step 5: Set Up a Water Bath
- Wrap the springform pan in foil to prevent leaks. Place it in a larger baking dish and add hot water halfway up the pan’s sides. This keeps the cheesecake from cracking.
Step 6: Bake the Cheesecake
- Bake for 55-60 minutes, until the edges are set and the center slightly jiggles. Turn off the oven, crack the door, and let the cheesecake cool inside for 1 hour.
Step 7: Chill the Cheesecake
- Remove the cheesecake from the water bath and foil. Refrigerate for at least 4 hours, preferably overnight, to set fully.
Step 8: Prepare the Cherry Topping
- In a small saucepan, mix cherry pie filling, lemon juice, and cornstarch (if using). Heat gently until slightly thickened, then cool. Spread over the chilled cheesecake.
Step 9: Garnish and Serve
- Add fresh cherries on top for a fancy touch, if desired. Slice and serve chilled for the best flavor. Store leftovers in the fridge.