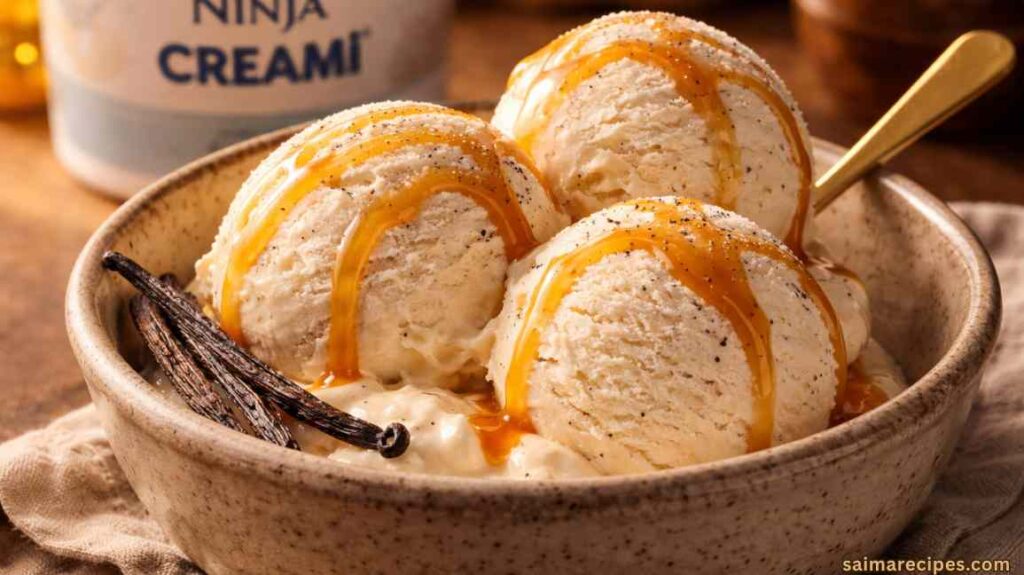
There’s something truly magical about homemade ice cream, especially when it’s whipped up effortlessly in your kitchen. If you’re searching for a ninja creami vanilla ice cream recipe without cream cheese, you’ve landed in the right spot.
This version keeps things simple and creamy using basic pantry staples, delivering that classic vanilla flavor without any fancy add-ins. Whether you’re lactose-tolerant or just prefer a lighter touch, this recipe skips the cream cheese often found in other mixes, focusing instead on pure, indulgent goodness that freezes perfectly in the Ninja Creami machine.
What makes this approach stand out is its straightforwardness—no need for complicated techniques or rare ingredients. You’ll end up with a smooth, scoopable treat that’s perfect for hot summer days or cozy winter evenings. I’ve tested this multiple times to ensure it churns out consistently delicious results, and it’s become a go-to in my household. Let’s dive into why this recipe has won over so many fans and how you can make it your own.
Why People Love This Ninja Creami Vanilla Ice Cream Recipe Without Cream Cheese
Home cooks everywhere rave about this recipe because it strikes the perfect balance between ease and quality. Unlike traditional ice cream makers that require constant churning or monitoring, the Ninja Creami transforms a frozen base into velvety ice cream in minutes, and this version without cream cheese appeals to those avoiding richer dairy elements.
It’s lighter on the palate yet still packs that nostalgic vanilla punch, making it ideal for families with varying tastes. Plus, customizing it is a breeze—add mix-ins like chocolate chips or fruit for endless variations without overcomplicating the base.
Another big draw is the cost savings and control over ingredients. Store-bought ice cream often comes loaded with preservatives and artificial flavors, but here, you know exactly what’s going in.
This recipe uses wholesome components like fresh milk and real vanilla, resulting in a cleaner taste that feels homemade from the first bite. Enthusiasts appreciate how it accommodates dietary tweaks, such as swapping in alternative milks for a vegan twist, while maintaining the creamy texture the Creami is famous for. It’s not just about the end product; it’s the satisfaction of creating something delightful with minimal effort that keeps people coming back.
Ingredients You’ll Need
To make this ninja creami vanilla ice cream without cream cheese, gather these simple items. This list serves about 4 people, yielding one full pint of ice cream.
- 1 cup whole milk (or 2% for a lighter option)
- 3/4 cup heavy whipping cream
- 1/2 cup granulated sugar
- 1 tablespoon pure vanilla extract
- A pinch of salt (optional, to enhance flavors)
- 1 teaspoon cornstarch (for added thickness, if desired)
These ingredients come together to form a base that’s naturally creamy without relying on cream cheese for structure. The heavy cream provides the richness, while the milk keeps it from being too heavy. Sugar dissolves easily, and vanilla is the star, so opt for high-quality extract to elevate the taste. If you’re watching calories, you could reduce the sugar slightly, but it might affect the freeze consistency.
Tools Required
You don’t need a full kitchen arsenal for this recipe—just a few essentials to mix and process.
- Ninja Creami machine (with pint container and lid)
- Mixing bowl
- Whisk or electric mixer
- Measuring cups and spoons
- Freezer (for overnight freezing)
The Ninja Creami is key here, as it aerates the frozen mixture into ice cream perfection. Make sure your pint is clean and dry before starting. A whisk works fine for blending, but an electric mixer speeds things up if you’re making multiple batches.
Step-by-Step Instructions
Preparing this ice cream is a straightforward process that anyone can follow. We’ll break it down into clear steps, ensuring you get that ideal texture every time.
Prepare the Base Mixture
Start by pouring the whole milk and heavy whipping cream into a mixing bowl. Add the granulated sugar, vanilla extract, and a pinch of salt if using.
Whisk everything together vigorously until the sugar fully dissolves, which should take about 2-3 minutes. If you’re adding cornstarch for extra thickness, mix it with a tablespoon of milk first to avoid lumps, then incorporate it into the bowl. Taste the mixture and adjust vanilla if needed—remember, flavors intensify when frozen.
Pour and Freeze the Base
Transfer the well-mixed base into your Ninja Creami pint container, filling it up to the max fill line but not over.
Secure the lid tightly and place the pint in the freezer on a flat surface. Let it freeze for at least 24 hours to ensure it’s solid all the way through. This step is crucial for the Creami’s processing; a partially frozen base won’t yield the creamy results you’re after.
Process in the Ninja Creami
Once frozen, remove the pint from the freezer and let it sit at room temperature for 5-10 minutes to soften slightly if it’s rock hard.
Install the pint into the Ninja Creami machine and select the “Ice Cream” setting. Let it run through the cycle, which typically takes a couple of minutes. If the mixture is still powdery after the first spin, add a splash of milk and re-spin on the “Re-Spin” function for smoother texture.
Add Mix-Ins (Optional)
After the initial processing, if you want to customize, remove the lid and add your favorite mix-ins like chopped nuts, cookie pieces, or fresh berries.
Reinstall the pint and use the “Mix-In” function on the Creami to incorporate them evenly without over-processing. This step keeps the ice cream’s base intact while distributing add-ins for bursts of flavor in every scoop.
Serve or Store
Scoop the finished ice cream into bowls right away for the softest serve, or return it to the freezer for 10-15 minutes if you prefer it firmer.
If storing, keep it in the pint with the lid on for up to two weeks, though it’s best enjoyed fresh. Clean your Creami parts immediately after use to maintain the machine’s performance.
Variations to Try
While the classic vanilla shines on its own, experimenting with variations can keep things exciting. For a dairy-free option, substitute coconut milk for the whole milk and coconut cream for the heavy cream—the tropical notes pair wonderfully with vanilla.
If you crave something fruity, swirl in pureed strawberries or blueberries before freezing for a marbled effect. Chocolate lovers might melt in some cocoa powder during mixing, turning it into a subtle vanilla-chocolate hybrid.
For those with dietary restrictions, using almond or oat milk works well, though you may need to increase the heavy cream equivalent to maintain creaminess. Add a teaspoon of instant pudding mix (vanilla flavor) if you miss the stabilizing effect of cream cheese, but keep it minimal to stay true to the recipe’s spirit. These tweaks allow you to tailor the ice cream to seasonal ingredients or personal preferences, making each batch feel fresh and unique.
Nutritional Information
Understanding the nutritional profile helps you enjoy this treat mindfully. Here’s a breakdown per serving (about 1/2 cup), based on the standard recipe yielding 4 servings.
| Nutrient | Amount per Serving | % Daily Value* |
|---|---|---|
| Calories | 250 | 13% |
| Total Fat | 15g | 19% |
| Saturated Fat | 9g | 45% |
| Cholesterol | 50mg | 17% |
| Sodium | 50mg | 2% |
| Total Carbohydrates | 25g | 9% |
| Dietary Fiber | 0g | 0% |
| Sugars | 24g | – |
| Protein | 3g | 6% |
| Vitamin D | 1mcg | 5% |
| Calcium | 100mg | 8% |
| Iron | 0.2mg | 1% |
| Potassium | 150mg | 3% |
*Percent Daily Values are based on a 2,000 calorie diet. Values may vary slightly depending on ingredient brands or substitutions.
This ice cream is a moderate indulgence, with the fats coming mostly from the cream for that luxurious mouthfeel. If you’re counting carbs, note the sugar content, but it’s lower than many commercial brands.
Tips for Perfect Ice Cream
Achieving the best results with your Ninja Creami involves a few handy tricks.
- Always freeze the base for a full 24 hours; rushing this leads to icy textures.
- Experiment with sugar types—coconut sugar adds a caramel undertone without altering the vanilla essence.
- If your mixture separates, give it a quick stir before pouring into the pint.
- For smoother scoops, store in an airtight container post-processing to prevent freezer burn.
- Clean the Creami blade thoroughly after each use to avoid flavor carryover in future batches.
These pointers come from trial and error, helping you avoid common pitfalls and enjoy consistently great ice cream.
Serving Suggestions
Elevate your homemade vanilla ice cream with creative pairings that make every serving special.
- Top with fresh berries and a drizzle of honey for a light, fruity contrast.
- Sandwich between two cookies for quick ice cream sandwiches—kids love assembling these.
- Serve alongside warm apple pie, letting the ice cream melt slightly for a comforting dessert.
- Blend into milkshakes by adding extra milk and processing again in the Creami.
- Garnish with crushed nuts or sprinkles for added crunch and visual appeal.
These ideas turn a simple scoop into a memorable treat, perfect for gatherings or solo indulgences.
Conclusion
In wrapping up, this ninja creami vanilla ice cream recipe without cream cheese proves that simplicity often yields the most satisfying results. With its creamy texture and pure vanilla flavor, it’s a versatile base for countless desserts, all made possible by the innovative Ninja Creami. Whether you’re a beginner or seasoned home chef, this method delivers joy in every bite, reminding us why homemade always tastes better.
FAQ
Can I make this recipe vegan?
Yes, swap the whole milk for almond or oat milk and use coconut cream instead of heavy whipping cream. The texture remains similar, though it might be slightly icier—add a bit more sugar to balance flavors.
Why does my ice cream come out powdery?
This usually happens if the base isn’t frozen solid or if there’s too much air in the mixture. Try freezing longer and use the re-spin function with a splash of milk for creaminess.
How long can I store the frozen base?
The base pint can stay in the freezer for up to a month before processing. Once made into ice cream, consume within two weeks for the best quality.
What if I don’t have heavy cream?
You can use half-and-half as a substitute, but the result will be less rich. For a closer match, mix milk with a bit of butter, though it’s not ideal.
Is this recipe kid-friendly to make?
Absolutely—kids can help with mixing and adding mix-ins. Just supervise the Creami machine, as it’s electric, and let them enjoy the fun transformation process.
Ninja Creami Vanilla Ice Cream Recipe Without Cream Cheese
Equipment
- Ninja Creami machine
- Mixing bowl
- Whisk or electric mixer
- Measuring cups and spoons
Ingredients
- 1 cup whole milk or 2% for a lighter option
- 3/4 cup heavy whipping cream
- 1/2 cup granulated sugar
- 1 tablespoon pure vanilla extract
- A pinch of salt optional, to enhance flavors
- 1 teaspoon cornstarch for added thickness, if desired
Instructions
Prepare the Base Mixture
- Start by pouring the whole milk and heavy whipping cream into a mixing bowl. Add the granulated sugar, vanilla extract, and a pinch of salt if using.
- Whisk everything together vigorously until the sugar fully dissolves, which should take about 2-3 minutes. If you’re adding cornstarch for extra thickness, mix it with a tablespoon of milk first to avoid lumps, then incorporate it into the bowl. Taste the mixture and adjust vanilla if needed—remember, flavors intensify when frozen.
Pour and Freeze the Base
- Transfer the well-mixed base into your Ninja Creami pint container, filling it up to the max fill line but not over.
- Secure the lid tightly and place the pint in the freezer on a flat surface. Let it freeze for at least 24 hours to ensure it’s solid all the way through. This step is crucial for the Creami’s processing; a partially frozen base won’t yield the creamy results you’re after.
Process in the Ninja Creami
- Once frozen, remove the pint from the freezer and let it sit at room temperature for 5-10 minutes to soften slightly if it’s rock hard.
- Install the pint into the Ninja Creami machine and select the “Ice Cream” setting. Let it run through the cycle, which typically takes a couple of minutes. If the mixture is still powdery after the first spin, add a splash of milk and re-spin on the “Re-Spin” function for smoother texture.
Add Mix-Ins (Optional)
- After the initial processing, if you want to customize, remove the lid and add your favorite mix-ins like chopped nuts, cookie pieces, or fresh berries.
- Reinstall the pint and use the “Mix-In” function on the Creami to incorporate them evenly without over-processing. This step keeps the ice cream’s base intact while distributing add-ins for bursts of flavor in every scoop.
Serve or Store
- Scoop the finished ice cream into bowls right away for the softest serve, or return it to the freezer for 10-15 minutes if you prefer it firmer.
- If storing, keep it in the pint with the lid on for up to two weeks, though it’s best enjoyed fresh. Clean your Creami parts immediately after use to maintain the machine’s performance.


This ice cream turned out amazing! I loved how creamy it was even without heavy cream. Any more flavor suggestions?
Thanks, Emma! Glad you liked it. You can try adding cocoa powder for chocolate or mint extract for a cool twist.
Such a fun activity with the kids! They loved picking their mix-ins. Thank you for sharing this!
You’re welcome, Jake! It’s definitely a great recipe for involving kids.
Tried this with fresh strawberries, and it was delightful. Refreshing and not too sweet!
Thanks, Sophia! Fresh fruit is always a great addition. Glad it worked out!
Worked perfectly with half-and-half. It wasn’t super rich, but it was still delicious!
Thanks for trying it out, Aiden! Happy to hear you enjoyed it with the substitute.
I didn’t have a Creami machine, so I blended everything and froze it—it still tasted great!
That’s creative, Lily! Great to hear it worked well even without the machine.