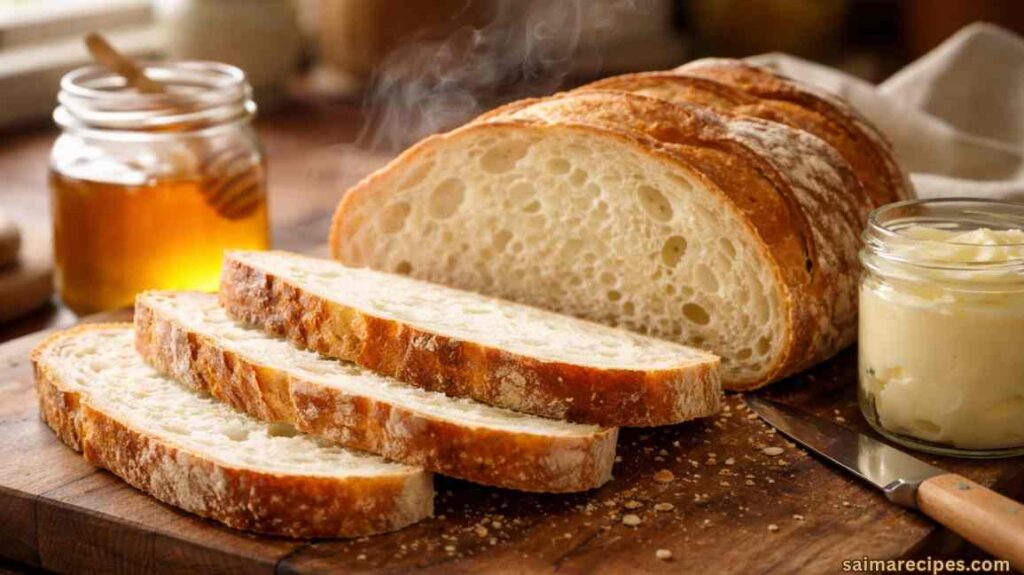
There’s nothing better than the smell of fresh bread baking in your own kitchen. If you want a soft, everyday bread with that classic sourdough tang, you’re going to love this recipe.
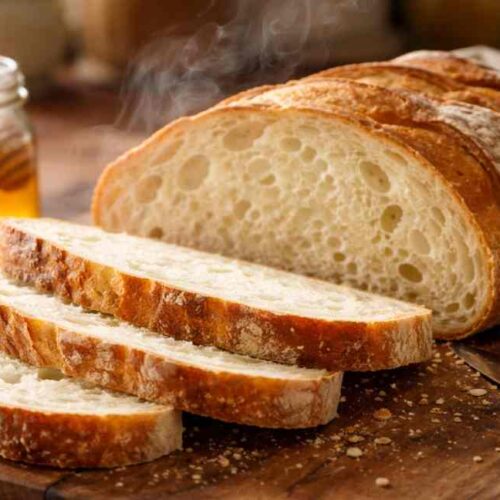
It’s fluffy, has a beautiful golden crust, and is perfect for everything from morning toast to your favorite sandwich. I’ve tested this many times to make sure it’s easy enough for beginners but still tastes like it came from a professional bakery.
This recipe uses natural fermentation for amazing flavor and texture, no commercial yeast needed. A touch of honey and butter keeps it soft and moist for days. Perfect for beginners or busy bakers, most of the work is just letting it rise. Let’s dive in and make it.
Why People Love This Soft Sourdough Sandwich Bread Recipe
Home bakers love this recipe because it makes a soft, sturdy loaf that’s perfect for sandwiches. Unlike heavy artisan sourdoughs, this one is enriched to create a fluffy texture, great for everything from PB&J to fancy paninis.
The sourdough starter adds a mild tang that’s not too strong, making it family-friendly. Plus, it’s an easy way to use up extra starter, turning it into a delicious loaf that smells amazing while it bakes.
Sourdough is popular because it’s easier to digest than quick-rise breads, thanks to its fermentation process. It also stays fresh longer without needing preservatives, reducing waste and trips to the store.
You can easily customize it by adding whole grains for more nutrition or herbs for extra flavor, making baking fun and creative. Sourdough isn’t just bread it’s a comforting, versatile food that feels rewarding to bake every time.
Ingredients You’ll Need
This soft sourdough sandwich bread comes together with everyday pantry items, yielding one large loaf or two smaller ones. Focus on quality for the best results, like using an active, bubbly starter that’s been fed recently.
- 200g active sourdough starter (about 1 cup, fed and at peak rise)
- 300g warm water (filtered if possible, around 80-90°F)
- 50g honey (or maple syrup for a vegan option)
- 30g unsalted butter, softened (or olive oil)
- 500g all-purpose flour (or bread flour for extra chew)
- 10g salt (fine sea salt works best)
- 100g whole milk (room temperature, for added tenderness)
These ingredients make a smooth dough that’s easy to work with. The starter adds flavor and help the bread rise, while honey makes it golden and slightly sweet. Butter and milk keep it soft and fluffy.
Tools Required
You won’t need fancy equipment for this bread, just some basics to mix, shape, and bake.
- Large mixing bowl
- Wooden spoon or stand mixer with dough hook
- Measuring scale (for accuracy, highly recommended)
- Loaf pan (9×5 inch, greased or lined)
- Plastic wrap or clean kitchen towel
- Oven thermometer (optional, for precise baking)
- Cooling rack
A scale ensures consistent results, especially with sourdough where hydration matters. The loaf pan gives it that classic sandwich shape, and a towel helps during rising to prevent drying out.
Step-by-Step Instructions
Creating this bread involves a few stages, but they’re straightforward and mostly passive. Plan ahead for the fermentation times.
Mix the Dough
In a large bowl, combine the active sourdough starter, warm water, honey, softened butter, and whole milk. Stir until everything blends smoothly and the starter disperses.
Add the all-purpose flour and salt, mixing with a wooden spoon until a shaggy dough forms—no dry spots should remain. Cover the bowl with plastic wrap and let it rest for 30 minutes to autolyse, allowing the flour to hydrate fully.
Knead and Develop Gluten
After resting, turn the dough out onto a lightly floured surface and knead for 8-10 minutes until smooth and elastic. If using a stand mixer, attach the dough hook and mix on low speed for 5-7 minutes.
The dough should pass the windowpane test—stretch a small piece thin enough to see light through without tearing. If it’s sticky, add flour a tablespoon at a time, but avoid overdoing it to keep the bread soft.
Return the dough to the bowl, cover, and let it bulk ferment in a warm spot for 4-6 hours, or until doubled in size.
Shape the Loaf
Once fermented, gently deflate the dough on a floured surface and shape it into a rectangle about the width of your loaf pan. Roll it tightly into a log, pinching the seam to seal.
Place the shaped dough seam-side down in the greased loaf pan. Cover loosely with a kitchen towel and let it rise for 2-4 hours, until it crests about an inch above the pan rim.
Bake the Bread
Preheat your oven to 375°F (190°C) with the rack in the middle position. Score the top of the risen dough lightly with a sharp knife for controlled expansion.
Bake for 35-40 minutes, until the top is golden brown and the internal temperature reaches 190-200°F. If it browns too quickly, tent with foil after 25 minutes.
Remove from the oven and let it cool in the pan for 10 minutes before transferring to a rack to cool completely—about 2 hours.
Slice and Store
Once fully cooled, slice with a serrated knife for clean cuts. Store in an airtight container at room temperature for up to 3 days, or freeze slices for longer freshness.
To revive, toast directly from frozen or wrap in a damp towel and warm in the oven. Proper cooling prevents sogginess, keeping the texture ideal.
Customize Your Loaf
The classic recipe is great, but these simple swaps can make it even better:
- Whole Grain: Swap 200g of flour for whole wheat to get a nuttier flavor. If the dough feels a bit dry, just add an extra splash of water.
- Seeded: Mix in 50g of sesame or poppy seeds while kneading for some extra crunch.
- Cheesy: Fold in grated cheddar or parmesan before shaping for delicious melty pockets.
- Vegan: Use plant-based milk and oil instead of butter and dairy. It stays just as soft!
- Herb-Infused: Stir in dried rosemary or thyme with your dry ingredients for a savory sandwich base.
These small changes let you personalize your bread without making the process any harder.
Nutritional Information
This bread offers a nutritious alternative to store-bought loaves, with natural fermentation aiding digestibility. Here’s a per-slice breakdown (assuming 12 slices per loaf), based on the standard ingredients.
| Nutrient | Amount per Slice | % Daily Value* |
|---|---|---|
| Calories | 150 | 8% |
| Total Fat | 3g | 4% |
| Saturated Fat | 1.5g | 8% |
| Cholesterol | 5mg | 2% |
| Sodium | 200mg | 9% |
| Total Carbohydrates | 28g | 10% |
| Dietary Fiber | 1g | 4% |
| Sugars | 4g | – |
| Protein | 4g | 8% |
| Calcium | 30mg | 2% |
| Iron | 1.5mg | 8% |
| Potassium | 80mg | 2% |
*Percent Daily Values are based on a 2,000 calorie diet. Variations like whole wheat will increase fiber, while reductions in honey lower sugars.
The fermentation process may reduce gluten’s impact for some, and the minimal additives keep it clean. Enjoy in moderation as part of a balanced diet.
Tips for Success
Getting the perfect loaf takes practice, but these pointers will help you along the way.
- Feed your starter 4-6 hours before mixing to ensure it’s active and bubbly—weak starter leads to flat bread.
- Monitor room temperature during fermentation; warmer spots speed it up, while cooler ones extend it for deeper flavor.
- If the dough is too sticky, wet your hands instead of adding extra flour to preserve hydration and softness.
- Use a proofing box or oven with the light on for consistent rising in drafty kitchens.
- Test doneness with a thermometer rather than just color, as ovens vary.
Applying these will troubleshoot common issues, leading to bakery-quality results at home.
Serving Suggestions
This bread shines in various roles, from simple to elaborate presentations.
- Layer with turkey, avocado, and greens for a hearty lunch sandwich that holds up without sogginess.
- Toast slices and top with jam or nut butter for a quick breakfast that’s both nourishing and satisfying.
- Use as a base for French toast, soaking in egg mixture and frying until golden for weekend brunches.
- Grill with cheese inside for melty paninis, pairing with soup on chilly days.
- Cube and bake into croutons for salads, adding a tangy crunch to fresh veggies.
These ideas highlight its versatility, making it a go-to for meals throughout the week.
Conclusion
To sum it up, this soft sourdough sandwich bread recipe transforms basic ingredients into a loaf that’s tender, flavorful, and endlessly useful. With its straightforward steps and forgiving nature, it’s an excellent entry into sourdough baking, rewarding you with homemade goodness that elevates any meal. Give it a try and discover why it becomes a staple in so many kitchens.
FAQ
How do I know if my starter is ready?
Your starter should double in size within 4-6 hours after feeding, with lots of bubbles on the surface. If it’s sluggish, feed it again and wait—using it at peak ensures good rise.
Can I make this without a loaf pan?
Yes, shape into a free-form loaf on a baking sheet, but it might spread more, resulting in wider slices. Score deeper to help with oven spring.
What if my dough doesn’t rise enough?
Check the temperature—aim for 75-80°F during fermentation. If still flat, your starter might need strengthening with daily feedings.
How long does the bread last?
It stays fresh for 3-4 days at room temp in a bag. For longer, slice and freeze; thaw as needed without losing texture.
Can I add mix-ins like raisins?
Absolutely—fold in up to 100g during shaping for even distribution. Avoid wet add-ins to prevent altering the dough’s hydration.
Perfect Soft Sourdough Sandwich Bread Recipe
Equipment
- Large mixing bowl
- Wooden spoon or stand mixer with dough hook
- Measuring scale
- Loaf pan (9×5 inch, greased or lined)
- Plastic wrap or clean kitchen towel
- Oven thermometer (optional, for precise baking)
- Cooling rack
Ingredients
- 200 g active sourdough starter about 1 cup, fed and at peak rise
- 300 g warm water filtered if possible, around 80-90°F
- 50 g honey or maple syrup for a vegan option
- 30 g unsalted butter softened (or olive oil)
- 500 g all-purpose flour or bread flour for extra chew
- 10 g salt fine sea salt works best
- 100 g whole milk room temperature, for added tenderness
Instructions
Mix the Dough
- In a large bowl, combine the active sourdough starter, warm water, honey, softened butter, and whole milk. Stir until everything blends smoothly and the starter disperses.
- Add the all-purpose flour and salt, mixing with a wooden spoon until a shaggy dough forms—no dry spots should remain. Cover the bowl with plastic wrap and let it rest for 30 minutes to autolyse, allowing the flour to hydrate fully.
Knead and Develop Gluten
- After resting, turn the dough out onto a lightly floured surface and knead for 8-10 minutes until smooth and elastic. If using a stand mixer, attach the dough hook and mix on low speed for 5-7 minutes.
- The dough should pass the windowpane test—stretch a small piece thin enough to see light through without tearing. If it’s sticky, add flour a tablespoon at a time, but avoid overdoing it to keep the bread soft.
- Return the dough to the bowl, cover, and let it bulk ferment in a warm spot for 4-6 hours, or until doubled in size.
Shape the Loaf
- Once fermented, gently deflate the dough on a floured surface and shape it into a rectangle about the width of your loaf pan. Roll it tightly into a log, pinching the seam to seal.
- Place the shaped dough seam-side down in the greased loaf pan. Cover loosely with a kitchen towel and let it rise for 2-4 hours, until it crests about an inch above the pan rim.
Bake the Bread
- Preheat your oven to 375°F (190°C) with the rack in the middle position. Score the top of the risen dough lightly with a sharp knife for controlled expansion.
- Bake for 35-40 minutes, until the top is golden brown and the internal temperature reaches 190-200°F. If it browns too quickly, tent with foil after 25 minutes.
- Remove from the oven and let it cool in the pan for 10 minutes before transferring to a rack to cool completely—about 2 hours.
Slice and Store
- Once fully cooled, slice with a serrated knife for clean cuts. Store in an airtight container at room temperature for up to 3 days, or freeze slices for longer freshness.
- To revive, toast directly from frozen or wrap in a damp towel and warm in the oven. Proper cooling prevents sogginess, keeping the texture ideal.


This recipe turned out amazing! My family loved the texture of the bread.
Thank you, Sarah! I’m so glad your family enjoyed it!
My dough was a bit sticky—any tips for handling?
Great question, Mike! Try lightly flouring your hands and surface to make it easier to work with.
I added some dried cranberries instead of raisins, and it was delicious!
That sounds wonderful, Emily! Great choice of mix-in!
The freezing tip saved me so much waste—bread tasted fresh even a week later.
Awesome to hear, Jake! Freezing really is a game-changer!
I struggled with getting the right dough temperature. Do you recommend a proofing box?
Hi Lily! A proofing box can help, but a warm spot in your kitchen or near the oven works just as well!