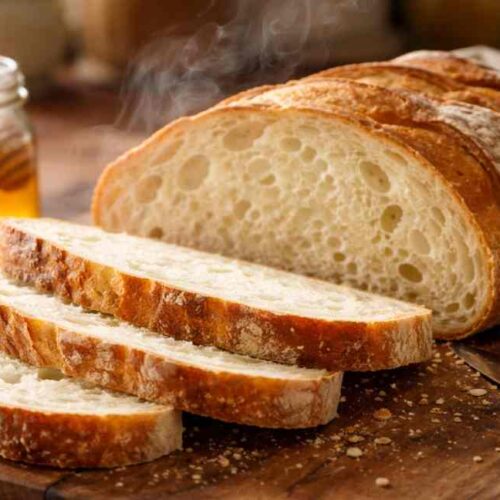
Perfect Soft Sourdough Sandwich Bread Recipe
This soft sourdough sandwich bread recipe creates a tender, tangy loaf using natural fermentation from an active starter, enriched with honey and butter for moisture. It's ideal for sandwiches or toast, yielding a fluffy crumb with a subtle sour note that's family-friendly. The process involves mixing, fermenting, shaping, and baking, with most time being hands-off rising periods. Perfect for beginners, it uses simple ingredients like flour, water, and milk to produce one large loaf. Overall, it's a healthier, homemade alternative to store-bought bread, staying fresh longer due to the sourdough process.
Equipment
- Large mixing bowl
- Wooden spoon or stand mixer with dough hook
- Measuring scale
- Loaf pan (9×5 inch, greased or lined)
- Plastic wrap or clean kitchen towel
- Oven thermometer (optional, for precise baking)
- Cooling rack
Ingredients
- 200 g active sourdough starter about 1 cup, fed and at peak rise
- 300 g warm water filtered if possible, around 80-90°F
- 50 g honey or maple syrup for a vegan option
- 30 g unsalted butter softened (or olive oil)
- 500 g all-purpose flour or bread flour for extra chew
- 10 g salt fine sea salt works best
- 100 g whole milk room temperature, for added tenderness
Instructions
Mix the Dough
- In a large bowl, combine the active sourdough starter, warm water, honey, softened butter, and whole milk. Stir until everything blends smoothly and the starter disperses.
- Add the all-purpose flour and salt, mixing with a wooden spoon until a shaggy dough forms—no dry spots should remain. Cover the bowl with plastic wrap and let it rest for 30 minutes to autolyse, allowing the flour to hydrate fully.
Knead and Develop Gluten
- After resting, turn the dough out onto a lightly floured surface and knead for 8-10 minutes until smooth and elastic. If using a stand mixer, attach the dough hook and mix on low speed for 5-7 minutes.
- The dough should pass the windowpane test—stretch a small piece thin enough to see light through without tearing. If it’s sticky, add flour a tablespoon at a time, but avoid overdoing it to keep the bread soft.
- Return the dough to the bowl, cover, and let it bulk ferment in a warm spot for 4-6 hours, or until doubled in size.
Shape the Loaf
- Once fermented, gently deflate the dough on a floured surface and shape it into a rectangle about the width of your loaf pan. Roll it tightly into a log, pinching the seam to seal.
- Place the shaped dough seam-side down in the greased loaf pan. Cover loosely with a kitchen towel and let it rise for 2-4 hours, until it crests about an inch above the pan rim.
Bake the Bread
- Preheat your oven to 375°F (190°C) with the rack in the middle position. Score the top of the risen dough lightly with a sharp knife for controlled expansion.
- Bake for 35-40 minutes, until the top is golden brown and the internal temperature reaches 190-200°F. If it browns too quickly, tent with foil after 25 minutes.
- Remove from the oven and let it cool in the pan for 10 minutes before transferring to a rack to cool completely—about 2 hours.
Slice and Store
- Once fully cooled, slice with a serrated knife for clean cuts. Store in an airtight container at room temperature for up to 3 days, or freeze slices for longer freshness.
- To revive, toast directly from frozen or wrap in a damp towel and warm in the oven. Proper cooling prevents sogginess, keeping the texture ideal.
Notes
When making this recipe, pay close attention to your starter's activity—feed it ahead to ensure a good rise, as a weak one can lead to dense bread. Monitor fermentation temperatures for consistent results; warmer environments speed things up but might overproof if not watched. Avoid adding too much flour during kneading to preserve the soft texture, and always cool the loaf completely before slicing to prevent gumminess. These steps help achieve bakery-quality bread at home every time.